
How to Install Floodlight Cameras: Step-by-Step Guide
Install Floodlight Cameras
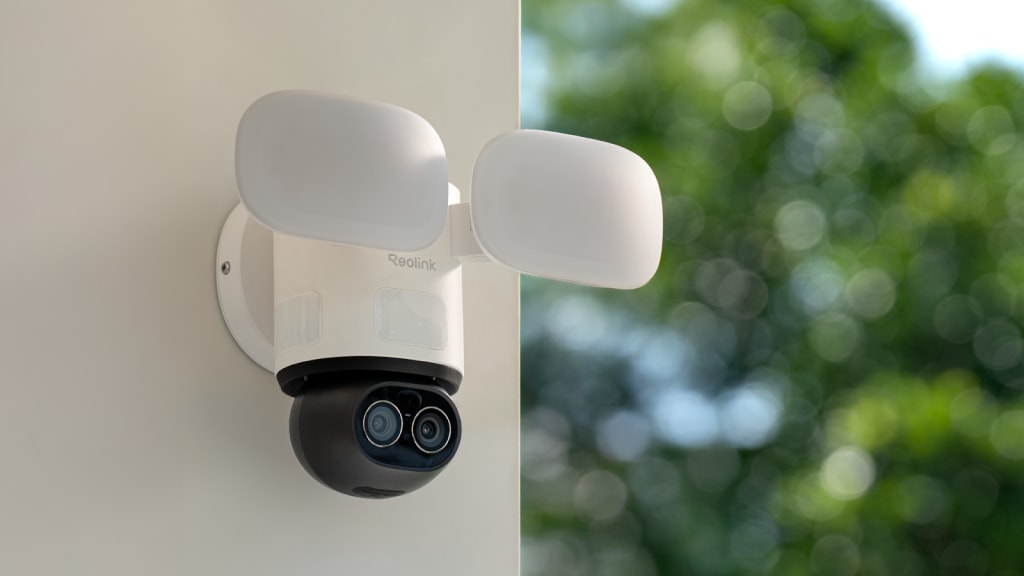
Floodlight cameras give strong security for homes and businesses. They mix bright lights with video recording to scare away intruders and catch clear footage. When you pick the best floodlight camera, you get reliable protection that works day and night. This guide takes you through the installation process in clear steps.
What You Need Before Installing a Floodlight Camera?
Before you begin the installation, collect all the items you need so the process goes well and stays safe. Spend some time to look over your tools and materials. Now, see the key tools and supplies you will use.
Screwdriver set: You need flathead and Phillips screwdrivers to take off old fixtures and fix the new camera in place. Sizes that fit different screws help, so a complete set works for most jobs. This tool lets you make tight connections.
Drill and drill bits: A power drill makes holes for mounting brackets or wiring. Pick bits that match wood, brick, or metal based on your surface. This tool makes the work faster and gives exact holes.
Wire strippers: These cut and take off covering from electrical wires. They make clean links without harm to the copper. Good stripping stops short circuits and keeps things safe.
Voltage tester: This tool checks if wires have electricity. You use it to make sure power is off before you touch any wiring. It keeps you safe from shocks and finds live wires.
Ladder: A strong ladder helps you reach high spots like eaves or walls. Pick one that holds your weight and fits the height. It holds you steady when you work up high.
Mounting hardware: Screws, anchors, and brackets often come with cameras, but extra ones help if your wall needs them. They keep the camera in place against wind and weather.
Sealant: Caulk or silicone that stands up to weather seals spaces around the mount. It stops water from getting in and harming parts. Put it on after you install it for protection that lasts.
Electrical tape: This covers wire links. Wrap it around joins to stop them from showing. It gives more safety from water and wear.
How to Choose the Best Location for Your Floodlight Camera?
After you get your tools set, think about the spot for the camera. The right place makes coverage as good as it can be. Look at how your property is set up and what you want for security. A good spot scares off threats and gives clear views. Here are main tips to help you choose.
Aim for high placement: Put the camera at least 9 feet up from the ground to stop people from messing with it. This height gives a wide view with no blocks. It also keeps the lens free from splashes or dirt.
Cover entry points: Set it to watch doors, gates, or driveways. These spots have the most action, so aim there. The camera catches movement where people might come in without invitation.
Ensure good lighting: Put it where the floodlight lights up dark areas. Stay away from spots with bright lights already that might make glare. This helps with better night vision.
Check for power source: For wired kinds, pick places near outlets or junction boxes. This cuts down on wiring and makes links easier. Wireless kinds need strong Wi-Fi signals.
Avoid direct sun: Keep the camera out of steady sunlight to stop it from getting too hot. Shade from eaves or trees works. This makes the device last longer and keep working well.
Test the view: Before you drill, hold the camera up and check the app for what it sees. Change it to get rid of blind spots. This makes sure you have the best coverage.
Consider weather exposure: Pick areas with some cover to guard against rain or snow. Overhangs give protection. This cuts down on care and stops harm over time.
Floodlight Camera Installation: Step-by-Step Guide
With the spot picked, you can start the real floodlight installation. Go through each step with care to keep things safe and working right. Read the manual for your model first. This guide shows general ways for outdoor and wireless types. Be careful around electricity.
How to Install Outdoor Floodlight Cameras?
Turn off power: Find the circuit breaker for the area. Switch it off and use a voltage tester to make sure no current is there. This step stops accidents with electricity while you work.
Remove old fixture: Unscrew and take off any light or mount that is there. Pull out wires with care and note their colors. Cover open ends with wire nuts for safety until you link the new unit.
Attach mounting bracket: Hold the bracket on the wall and mark where holes go. Drill small holes if you need, then fix it with screws and anchors. Make sure it is level for a straight setup.
Connect wires: Match the camera wires to the house wiring. Black to black for hot, white to white for neutral, and green or bare to ground. Twist them tight with wire nuts.
Secure the camera: Line up the camera with the bracket and fix it in place. Tighten all screws to hold it strong. Change the angle to aim at the area you want.
Apply sealant: Put a line of caulk around the base where it touches the wall. Smooth it with a finger or tool. This stops water from getting in and guards the inside parts.
Restore power: Turn the breaker back on and test the camera. Check the lights and video through the app. Make sure it all works as it should.
Set up app: Get the maker's app and follow steps to link it. Make an account, add the device, and set things like motion sense and light levels.
How to Install Wireless Floodlight Cameras?
Charge the battery: If your model has a battery you can take out, charge it all the way before you start. Plug it in and wait for the sign that it is full. This gives a long first run time.
Mount the bracket: Put the bracket at your spot and mark holes. Drill and put in anchors if the surface needs them. Screw the bracket tight to the wall.
Attach the camera: Snap or screw the camera on the bracket. Change its aim to cover the target area. Make sure it locks in place.
Connect to Wi-Fi: Open the app on your phone and pick an add device. Follow steps to pair the camera with your network. Put in your Wi-Fi password when asked.
Test the connection: Look at the live feed in the app to check signal strength. Move the router closer if the picture slows or cuts off. Good Wi-Fi stops breaks.
Configure settings: Set zones for motion to aim at certain areas. Change light brightness and how long it stays on. Turn on alerts for your phone.
Secure with screws: Use screws that come with it to lock the camera. This stops theft. Check all parts for tightness.
Monitor battery: In the app, watch battery levels often. Charge when needed to keep it running. Put it in spots with sun if it uses solar.
Installation Mistakes to Avoid
After you finish the steps, look over your work to find common errors. Mistakes can cause bad work or risks to safety. Learn from these issues to make your setup last. Fix problems early for security you can trust.
Ignoring weatherproofing: People skip sealant often, and that lets water get in and cause shorts. Always put caulk around edges to keep water out and guard the parts.
Poor wire connections: Loose wires make fire risks or power that comes and goes. Twist them tight with nuts and tape for links that stay safe and last.
Blocking the view: If you mount too low or behind things, it hides the footage. Test the angle first to make sure no trees or walls block the sight.
Weak Wi-Fi for wireless models: If it is far from the router, links drop. Put it closer or use boosters to keep video steady.
Forgetting to test: If you skip checks at the end, you miss issues like dead spots. Always check lights, camera, and app right after you install.
Using wrong tools: Drill bits that do not fit harm walls or do not hold. Match tools to your surface for mounts that are strong and clean.
Overlooking permits: Some places need okay for outdoor wiring. Check rules in your area to stay away from fines or having to take it down.
FAQs
Do you need an electrician to install a floodlight?
You do not need an electrician every time to install a floodlight. If you know basic wiring and have the tools, you can do it on your own. For hard setups or if you have no practice, get a pro to handle it. They make sure it is safe and follows rules. This way, you avoid shocks or other dangers. It also helps the camera work well for a long time.
Can I install a floodlight myself?
Yes, you can put in a floodlight by yourself if you have the right tools and follow the steps. First, turn off the power, then mount the unit and link it with care. Read the manual and test all parts. If wiring scares you, pick a wireless type for a simple setup with no electric work. This makes the job easier and quicker for most people. Always put safety first to stop any issues.
How to install wired floodlight Cameras?
To put in wired floodlight cameras, start by cutting power at the breaker. Take off the old fixture, fix the new bracket, and link wires by matching colors. Fix the camera in place, seal any gaps, and turn power back on. Use the app to set it up and test the video and lights. Make sure you check for good function. This process keeps things safe and gives strong security.
Conclusion
Putting in a floodlight camera makes your property safer with light and watch. If you follow this guide, you get a good setup. Check the device often to keep it working well over time.
About the Creator
Keep reading
More stories from Bilal Ahmad and writers in Lifehack and other communities.
Top Trends in Localization Service Shaping 2024
With multinational businesses now operating internationally, localization service providers have become a crucial part of this globalizing world by assisting companies in better communicating with non-native-speaking customers and moving away from a geographical focus to explore the entire international market. For this reason, the localization industry is evolving unprecedentedly alongside the rapid development of the latest technologies, thus influencing consumers’ expectations and habits. It encourages organizations to rethink how they approach entering a new international market and how they interact with global customers.
By Bilal Ahmadabout a year ago in Lifehack
I was in a Toxic Relationship, with my Workplace
“You got that?” My ex yelled. His hands were balled into fists at his side. At six foot three, he towered over me. A normal person would have been afraid, but I looked up a video of George Lopez repeatedly saying, “I got this,” and showed it to him. I had grown used to this treatment, so much so that I didn’t blink when he ripped the phone from my hand and threw it across the room.
By Jade M.4 days ago in Confessions


Comments
There are no comments for this story
Be the first to respond and start the conversation.